Unit 9: Product Photography
- Dylan Cox

- Oct 6, 2022
- 7 min read
Updated: Nov 24, 2022
Chapter One - Context & Research
Introduction
For this unit, I have been asked to capture and put together a variety of advertising material for a start-up fashion and footwear company called "GOOD VIBES". In order to complete this section of the unit, I have been challenged with the responsibility of creating their very first advertising campaign, creating still images to be used across their social media platforms in order to advertise products to potential customers. From taking part in this unit, I look to learn how to effectively plan out a working advertising campaign that could be potentially used in the real world to successfully boost the sales of a product. As well as creating an image in which the brand can build off.
Subject research into product photography
Product photography is seen as an important factor for any business as it is a way of showing your products to potential customers who may not be able to physically see or feel their products. So quite literally these images will be doing the selling for these company's meaning it is crucial that they are done to a professional standard and are pleasing to look at, because well done product photography is not only a way of showing the quality of your brand but also shows to your customers the credibility of a brands image. One example of this would be the comparison between the following two images.
On the left we have an image taken from Dior's Sauvage campaign and on the right a smaller brand with presumably a much smaller budget in comparison to Dior.
Looking at both images side by side they both have features that stand out and are both expectable in terms of what is expected but it's very clear which one is the more known and highly thought of brand. And this can be due to a few reasons, one main feature that sticks out is the celebrity endorsement. Having someone famous like Jonny Depp being the face of your product can make a huge difference in sales as celebrities like him have loyal fanbases who will want to be in possession of things that he is advertising.
Another difference between the two would be how the overall image is lit and presented. The image on the right is quite dim and low lit, creating quite a dull and flat looking image with a quite basic colour scheme which in my opinion is not that exciting or pleasing to look as a protentional customer for the product being advertised. while the image on the left is interesting as it has clear depth with there being a campfire setting with a noon sky in the distance behind the model.
Coke Advertising campaigns (Analyse)
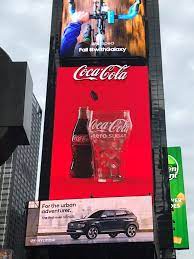
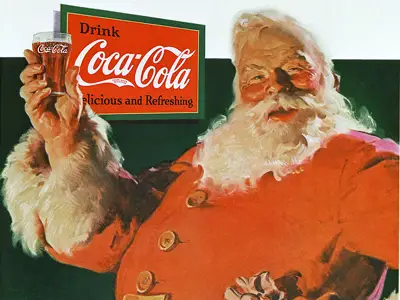
The red and white Coca-Cola logo is recognised by 94% of the world’s population. Meaning that Coca-Cola is one of the most acknowledged brands in the world, launching some largely successful marketing campaigns throwing their brand across the globe. Most of us will sometimes associate Coca-Cola with Christmas. Combined with the song ‘Holidays are Coming’ and seeing happy red Santa’s plastered across our televisions.
The TV advertisement were launched in 1995, when we watched a fleet of Christmas trucks known as ‘Christmas Caravans’ bring joy to awe-eyed children. Now known as the ‘Holidays Are Coming’, the momentous campaign has been shown across all of Coca-Cola’s channels, from using social media to spread awareness to a real-life tour of the Coca-Cola Christmas truck in the UK. The ad has traditionally focused on the classic drink but in 2018, the brand shifted the campaign's focus to Coke Zero in a bid to appeal to a younger, more health-conscious audience. Naturally, Coca-Cola has had to adapt all of its marketing campaigns to real-world events. They did this particularly well with the ‘Holidays Are Coming’ campaign in December 2020, responding to the Coronavirus pandemic. This ad was crowned the most successful Christmas ad of the year by Kantar, being named the most powerful, most enjoyable, generating the most love, and ad with the strongest branding. Campaign's like this are why brands such as Coca-Cola are huge and well known across the globe, bringing billions of revenue into the company.
Chapter Two - Preproduction Planning
For this project I plan on creating and putting together my own photoshoot of my Casio watch for my product photography. For this I plan on fully designing the whole scene myself, from the set to organising my own lighting so this piece of work is as authentic as possible.
The scene I plan on creating will be one inspired by nature, Having my project be quite low lit but full of different greenery. In order to understand more of this I looked to see if there were any similar examples of this online.
Equipment research
The main Core equipment that helps shoot would be equipment such as the camera and the lens but to up the value of your work you can also involve other types of equipment as-well. Lighting and all the relevant product photography accessories, like Soft boxes are commonly used in photography as a soft source of light that calms down harsh shadows. The walls of a soft box are reflective to increase the light intensity as it escapes out through the front diffusion screen. I plan on using this form of lighting in order to light up the product that I will be shooting as lights are a key factor in product photography, nearly always used in professional shoots. Then there is equipment that helps to stabilise or fix the camera such as a tripod, grips, and a C stand.
Chapter Three - Production

For my production I wanted to create an almost forest like environment but one that I could have complete control over the lighting as I felt this would be an important factor in this shoot going well. For the set I had to improvise a little so I found a box and cut off the top and then filled it with soil from my garden. Once filled up I also grabbed a few stones, sticks and leaves just to add more detail to the scene so that it wasn't just the dirt and the watch. Now that my scene was made I then went on to setting it up real for shooting. I worked with what I had and placed my soft light on top of a cup and angled it around ( This was moved around throughout the shoot) I then also placed a large rock under the box itself so that it is elevated allowing me to shoot more interesting angles.
Equipment used
For this shoot i shot on a DSLR camera with a 50mm lens. I had chosen to shoot my Product photography on a DSLR camera because of the wide variety of lenses that I could use for the shoot.
But I didn't just shoot with the camera and the product, with me I had a small soft box which allowed me to create different scenes just by changing the colour of the lighting or the strength of the lighting.
Chapter Four - Postproduction & Presentation
Lightroom
After shooting I got the images off of the SD card and once sorted through they were put straight into light-room, which is an editing software that enables you to make tweaks to your images. Changes such as being Abe to change the saturation or brightness of the image. There is also a "blemish" feature which allows you to get rid of things in the shot by just a click of a button.
Canva
Then once the image had been adjusted to how I wanted I then needed to add overlays to the image. For the graphic stage of this production I turned to canva which is an easy to use software that allows you to add a plethora of different graphics to my image, giving it a more of a advertising look in order to fit the project brief. I experimented with different lines and effects until I decided on a simple box design with the Casio logo which I had found online.
As well as use for the overall design of the project I had also used Canva to create a few different designs for the "GOOD VIBES" logo. In order to find one I was happy with a created several different designs to then decide on one to use as the logo for my finished product.
The majority of the logs I had gone for a clean B&W look as I thought It looked clean and elegant. but I had also decided to experiment with a bit of colour for one just to see the outcome. and with a few more tweaks I had decided that that would be the one id go for eventually, I just liked the polished look and though it had quite a modern look to it .
Final Product
Evaluation
Strengths & Weakness - Product Photography
PROS
-I really enjoyed this project as I felt it had given me this opportunity to workshop, and try out different techniques similar to the kind that are used in professional productions.
- During this project I had also designed the complete set for my shoot which Is something quite out of my typical skill set but I am personally proud of it and happy with how it looked and turned out as a whole.
- Finally One more ting I am proud of and feel has gone well would have to be the post production process of this project where I had to edit the images in Lightroom, as I am quite happy with how they turned out in the end.
CONS
- One of the main weakness of my project would probably be how some of my shots may come cross as similar so if I was to do this again I would probably research into more unique and interesting ways to show the product that I'm shooting.
- Another thing I would probably improve in the future would probably be to also experiment with photoshop as I feel it would open new doors to what I can include in my posters, upping the work quality and worth.
- Finally one last thing I would say was a weakness would probably be getting to know the camera that I am using more as I had struggled with getting the camera to pick up important details on the product such as the logo and other features I had wanted to be visible to the viewers.
To sum up this project as a whole I would say I really enjoyed learning about product photography and how much difference detail can make to a campaign. I feel that this unit has opened my eyes to how product photography has been used in both past and present to sell the brand and their products to potential buyers. One of the most key things I will take from this project would probably be the importance of getting the lighting right as it can really "make or break" the image so I really practiced and researched to ensure I know exactly what to do to create the best possible piece of work possible to my capabilities.


Comments