Unit 1 / Unit 2 / Skills building & A day in the life
- Dylan Cox

- Sep 7, 2021
- 10 min read
Updated: May 25, 2022
Light trails / Light painting
For this first project I will be learning new skills and attending workshop activities so that I can begin to understand the media sector. I will be annotating and writing into my WIX website for all the evidence of these workshops including research techniques.
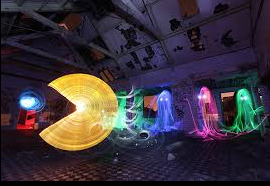
Light trails is an effect not created through an editing software but through a few tweaks of a camera and a moving light source. To begin you slow down the shutter speed on a DSLR camera and aim the camera at the moving light you want to capture making sure the camera is as still as possible, or on a tripod, to make sure you can get as clear as image as possible. The camera setting were as follows: between 10-30 seconds for the camera shutter, ISO set to 100 for best quality and the scene pre-focused. The latter is done so that each image in sharp focus. If we used the auto focus on the camera it would not be able to cope with the low light levels.
The two big inspirations for our light trails work where from photographers and Artists, Atton Conrad & Michael Bosanko who use this certain technique to help companies create attractive advertisements for their products as well as creating eye-catching art work just as part as their own projects. Atton is a London based photographer that has his own unique style and has gained a reputation for using light trails creatively. He has photographed campaigns for global brands including Nike, Aston Martin, Belvedere vodka to name a few. He uses light trails than lights that he makes himself, experimenting heavily until he has the right look. Below are a few examples of his work.
Michael Bolsanko uses light trails in a different way than Atton. He sells his work as fine art prints and is really good at drawing. He creates art using light trails as his canvas.
I have learnt from this workshop how, using this technique, I can create interesting and individual pieces of photography without the need of an editing software as well as this I have also had a go at learning the styles and techniques of Atton Conrad & Michael Bosanko in our group and implemented their techniques into work of our own which is seen below.
Below are more images that we did as a group, again experimenting with different light sources, silhouettes and some using a small flash and flashing several times during a 30 second exposure. This gave the person 3 heads...
The best part of light trails was the fact that each one is created in-camera and not post produced. They can be as create as you want them to be and the more you practice and experiment the more creative we got. I really like the artists that I reviewed and they were both very different. It has opened up my eyes to the possibilities of light trails and I will definitely use this technique in the future.
Visual Composition
This workshop was all about framing and understanding some of the main rules of composition. Composition is how the elements of a photo are arranged, it's how the person taking the picture puts those things within a frame that help a photograph become more or less interesting to a viewer. There are three main rules when taking a picture which consist of the following...
The rule of thirds is a technique where you would place a key part of the image in the left or right third of your photo leaving the two other thirds more open. this can be used for composing films, paintings and photographs.
The rule of thirds is one of the most useful composition techniques In photography and it's an important thing to learn and understand as it can be used in all types of photography to produce images which are more engaging and appealing to the eye.

Here our some of my own examples taken out in Southport.
Both have a section of the image where the main focus points placed, like the image of the stairs I have made sure that the railings are seen on the far right of the image.

And in my second image I have taken it so that the wall can be seen in the lower part of the image taking up the three boxes at the bottom of the frame leaving six above.
Leading lines is also a key technique for ensuring your photo can look as good as possible to the human eye. Leading lines can be achieved by finding lines that can be positioned by the person taking the photo to draw a persons eye towards a specific point of interest or just to a certain portion of the image. ( Shown in these example images below )
There are many creative ways in which you can take a picture with leading lines, it could be the edge of something and have that edge the main focus point with the lines attached to that edge going off out of the frame or a popular option is roads or bridges as you can stand centre of these and aim the camera so that your line you have chosen is seen fading out onto the horizon in the image.
Below are some we as a group taken using the leading lines technique.
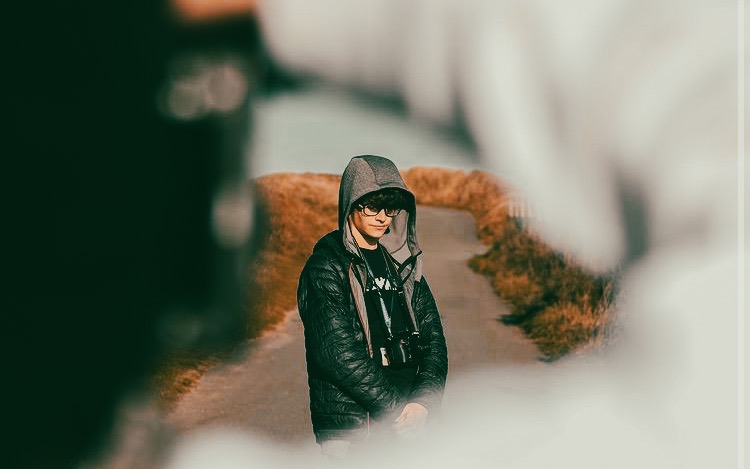
Finally another key technique is called frame in a frame which is all about positioning your main focus so that its framed by something else within the scene which opens up many different opportunities and avenues to making your image interesting.
The photographer can use anything to achieve this technique whether it be a rectangular frame such as a window, door or even through the use of nature such as using tree branches or a plant to create a frame for your main focus.
Here our some we as a group taken using the frame in a frame technique.
A Day in the Life Production
My first production is with the theme of 'A Day in the Life'. I can choose my own subject for this project. What I am thinking of is using a student and following them for a day, I may even use myself.
Video Evaluation
Here is my finished day in the life project video which i shot on my iPhone SE 2 on 4k and edited on a editing software called cap-cut.

I used the transition pre-sets provided for me on the software to give my video a more professional look as well as to produce a much smoother transition in between the clips which i was most proud of when putting the clips together. The places i decided to film were mostly in college with a few shots of me travelling as well to fit with my project theme of a day in the life of a student.
One thing I found challenging was choosing what clips to choose and include in the edit as I over filmed so that I had multiple choice of what I can feature in the video.
As the video was nearly completed I made the decision to make changes before I decided it was fully complete. This was because I decided that I had included too much of my "traveling" section of the video so I made the decision to shorten these clips and including more footage of inside the college itself and what I would be getting up to there.
One of my aims for my video was to film a few clips of me walking around college from the waist down making sure my feet were centre screen in each video so that when they were played back together it would create an effect that just the background was changing as I walked to places In the college.
One main thing I'm looking to improve on in future projects would be to use a more professional editing software for putting my clips together, Applications such as premier pro and premier rush are the kind I aim to use in the future.
Here is my finished Ten photos for my day in the life project where I did "a day in the life of a student", from being at home to travelling to college to then showcasing what I would be up to during a typical day in Southport college. Originally I took in total 22 photos but narrowed it down to 10 and put each one through light room to give the a more appealing look.
Different shot types and camera angles
For this workshop we used our iPhone's &/ or a stills camera to capture all the seven camera angles that we have learnt. Camera angles are used to help the viewer further understand the mood of the moving image or picture in different ways depending what angle you decide to take it at. They can also be used to create tension and suspense for the viewing audience.
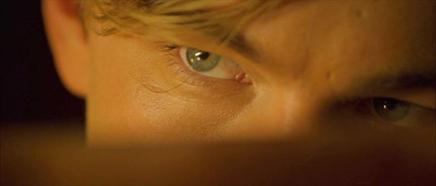
Close up
A close-up shot is a type of camera shot size in film and television that adds emotion to a scene. It tightly frames the scene or an actor's face, making their reaction the main focus in the frame. It is the responsibility of the director of photography to film a close-up using a long lens at a close range. This enables him to fill the frame.
Wide shot
A wide shot is often at times used as an establishing shot in a film, as it normally sets the scene and the character's place within it. This type of camera shot, shows the full length of the subject while also including a large amount of the surrounding area of the film setting.
Dutch Angle
The Dutch angle is a type of camera shot which involves setting the camera at an angle on its roll axis so that the shot is composed with vertical lines at an angle to the side of the frame, or so that the horizon line of the shot is not parallel with the bottom of the camera frame.
Low Angle
A low-angle shot is a shot in which the camera angle is positioned below the eye line of the subject, pointing upward. An extreme low-angle shot is positioned below the subject’s feet, offering a sharper contrast in the shot.
Medium Angle
A medium shot, also called a mid-shot or waist shot, is a type of camera shot in film and television that shows an actor approximately from the waist up.
High Angle
A high angle shot looks down at the subject from a higher perspective and can convey information or elicit an emotional response from the audience. It is one of many camera angles that filmmakers can use to contribute to the story they are telling in a film and can sometimes make the character seem vulnerable.
EDFAT
E-D-F-A-T stands for Entire, Detail, Frame, Angles and Time and is used to more clearly show visual stories using pictures. its also seen as a great way to document journeys with the complete story such as our "day in the life" project.
Entire
Entire means to capture a picture of the whole scene all in one image. Entire is a good way to frame the subjects within a specific place or when there is a large gathering of people and you want to capture them all in one image which is achieved by taking a wide shot.
Detail
Detail is in a way the opposite to Entire as instead if taking a wide shot Detail requires us to capture the specifics of a subject close up so that the viewer can see every little detail of a subject. An example of this may be taking a close up shot of a brick wall and being able to see all the little cracks and breaks in the wall as well as the different colours in the bricks.
Frame
Frame is when you pay attention to your surroundings and use it to focus on what you think is the most interesting point of your picture.
Angle
When capturing an image you can completely change the message behind it solely based off of what angle you decide to shot it in. For example a high angle image of a person may make them seem vulnerable and a low angle of someone will make them seem big and powerful.
Time
Time means the moment of a scene or the perfect moment that occurs in a period of time like for example waiting for a certain car to drive past so that you can capture a still image of it or waiting up at night for a meteor shower so that you can capture it just as its happening.
Evaluation
This projects format was a "Day in the life of" where we was allowed to choose a theme of any kind and take pictures and moving images that are based around the theme we have chosen. I eventually then went on to choose to focus on the day in the life of a student where I would document what its like to be a student in Southport college through a visual form using techniques such as rule of thirds and leading lines in both my moving image and still image to show the best of my abilities. My shots were mostly all done in lesson time as well as my free time in the college its self as with the nature of my theme I wanted to capture it all in an actual learning environment rather than it being staged. I didn't encounter much issues whilst planning except finding good opportunities for still images within the space in the college as it felt like I was limited to the kind of shots I could get. I found the production part of the project to be a good opportunity to be creative and experiment with all the composition techniques I have learnt and be able to use that in my work as well as the different variety of camera angles I have been shown which I feel opens a lot of new opportunities in terms of what I can do. I then, For my postproduction for my still image used Lightroom where I experimented with the pre-sets provided to try and get the best version of my images as possible and have them be as pleasing to look at as possible. I feel like I have met the requirements for my brief as I feel my still images were appropriate to match my theme and show a clear insight into what its like to be a student studying in a college. As well as this I also feel my moving image footage which I created a short film fit into the brief as it was shot in a story like way where it had a start and finish as it went from travelling to the college to what a typical student may get up to on a typical day. For future productions I look to improve things such as using a more professional video camera rather than my phone to have a better finished product as well as use a more technical video editing software instead of a mobile app to put together my moving image footage.


Comments