Unit 6 - Landscape film Production
- Dylan Cox
- Jan 11, 2022
- 4 min read
Updated: Dec 5, 2022
In this Unit I will be looking into the historical timeline of film and darkroom practice by researching heavily online and documenting what I find along the way. As well as this I will be partaking in workshops in the darkroom which will involve working with film and analogue techniques such as dodging and burning as well as looking into exposure control.
The history of Film and Photography
Camera Obscura
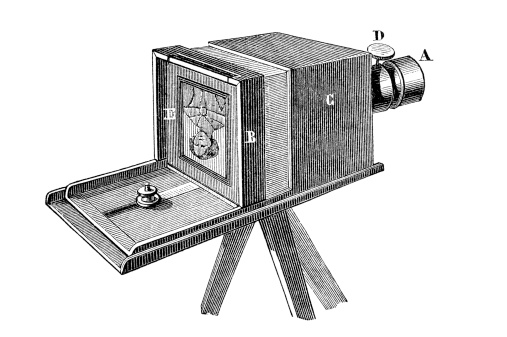
Camera obscura with a lens in the opening have been used since the second half of the 16th century and became popular for drawing and painting. Since the Renaissance era, artists and inventors had searched for a mechanical method of capturing visual scenes. The camera obscura box was developed further into the photographic camera in the first half of the 19th century when camera obscura boxes were used to expose light-sensitive materials to the projected image, creating one of the first types of a photographic image.
Daguerreotype
Invented by Louis-Jacques-Mandé Daguerre and introduced to the world in 1839, The Daguerreotype process was the first commercially successful photographic process in the history of photography and involved a direct-positive process, creating a highly detailed image on a sheet of copper plated with a thin coat of silver without the use of a negative. After exposure to light, the plate was developed over hot mercury until an image appeared
which could take as little as a few seconds for brightly sunlit subjects or much longer with less intense lighting.
Photograms
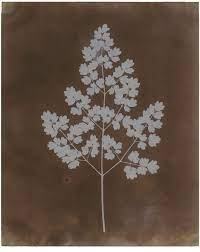
The technique of creating photographic prints without using a camera is as old as photography itself and was discovered in 1841 by William Henry Fox Talbot who is considered "the grandfather of photography" and created photograms using paper coated with silver iodide. The paper, shielded from further exposure to daylight, was removed from the camera and the image was chemically developed into a fully visible image. This process would later be implemented into the film photography process in a dark room when processing images. In this modern day photograms are now generally used for an artistic effect to create surreal images, rather than for its original use which was for "true life" or accurate image reproduction.
Pinhole Photography/workshop
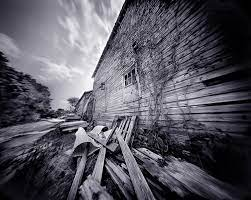
Pinhole photography is a lens-less technique used to capture a photographic image. It is achieved by a tiny hole that replaces the lens and when light passes through the hole an image is formed onto a film or sensitive photographic paper. But to note Long exposures are required and he results can turn out extremely "dream-like".
To get a better understanding on pinhole photography we as a class all took part in a workshop which involved us going out and experimenting with a custom pinhole camera where we took group photos to see how they worked. For the camera to work we had to expose the camera for two minutes then cover it back up again so that we did to over expose the light sensitive paper that was inside.
Below are images of us all experimenting with the pinhole camera in our college yard And below are the results after the processing of the light sensitive paperDarkroom workshops
During this unit we took part in darkroom workshops where we had the chance to learn about and use the equipment used to process film. One of the first things we had learnt in these workshops were how to do a test shot which involves using an enlarger to enlarger the image on the negative films onto a surface which allows you to see your image on a bigger scale through the usage of light shining through the film and revealing itself on the small platform below.
Once the image was adjusted to how we wanted it we then turned off the light and set the timer dial to two seconds so that we could then expose the light sensitive paper in our own intervals, covering bits of the image gradually with a piece of card so that we can later on see how much light exposure works best for that specific image we plan to use, knowing that each section is going up in two second parts.
(Insert images of test strips)
Then finally we placed the exposed paper with its laminated shining side facing down into the llford print processor and approximately 60 seconds later we had the developed photographic image with its different light exposures clearly shown
Traditional toning
To further enhance our knowledge we then took it a step further and within our workshops took part in traditional toning our photographs that we previously processed.
The reasoning for toning an photograph is to change the colour of the original black and white image and give it a slight tone of colour depending what chemical you have the image in as in traditional photography, toning is a simple chemical process carried out on silver-based photographic prints which you immerse in the toner and gently agitate until the desired amount of toner is achieved.
Common types of toners
Selenium Toner

Selenium toner is a popular toning process, A diluted solution gives a red-brown tone, while a strong solution gives a purple-brown tone.
Sepia-toner

Sepia toner produces a warmer tone and also enhances archival qualities. Chemicals are used to convert the metallic silver in the print to a sulfide compound, which is more resistant to the effects of environmental pollutants.
This process is not just limited to using chemical techniques but can also be achieved in a much faster and cost efficient way through digital editing softwares such as photoshop but a downside to this is they may not be as good results compared to traditional chemical toning.
Final Film
Evaluation








Comments